Cabinets are quite expensive to replace these days. If you are looking to refresh or replace your cabinets but are worried about the price, why not refurbish them with a fresh refinishing.
While it can be a little complex to refinish your cabinets, they will look great and save you a load of money you can put to better use somewhere else.
Follow the tips below to help you refinish the cabinets in your home with efficiency, ease, and style.
Table of Contents
What are the Best Cabinet Refinishing Tips?
To refinish cabinets remove the doors, clean the gunk off the doors, remove all the fixtures, sand the areas down, use the correct paint, and most importantly take your time and have patience.
Do I Need To Remove The Doorknobs And Handles to refinish cabinets?
Yes, you do. It is quite easy to remove the doorknobs and fronts. This is done with a drill that is fitted with the correct part to undo the screws that hold the hinges in place.
As you take each handle and screws off, it is a good idea to place them in separate bags and label them, which will make it easier to keep track of what part pairs with the cabinets and drawers.
Is It Important To Clean The Cabinets Before Painting?
This is one of the most important parts of the process of refinishing cabinets.
Most times, we just quickly run over our cabinets with a wet cloth to clean them, but this doesn’t remove everything.
After years and years, of handling the cupboards, they would most likely have a buildup of gunk that cannot just be wiped with a cloth. You can use a mixture of water and trisodium phosphate to wipe down all the parts that you are going to paint.
It is best to wear gloves to avoid any irritation to your hands, and don’t let the water soak on the cabinets, dry as soon as you are finished cleaning them.
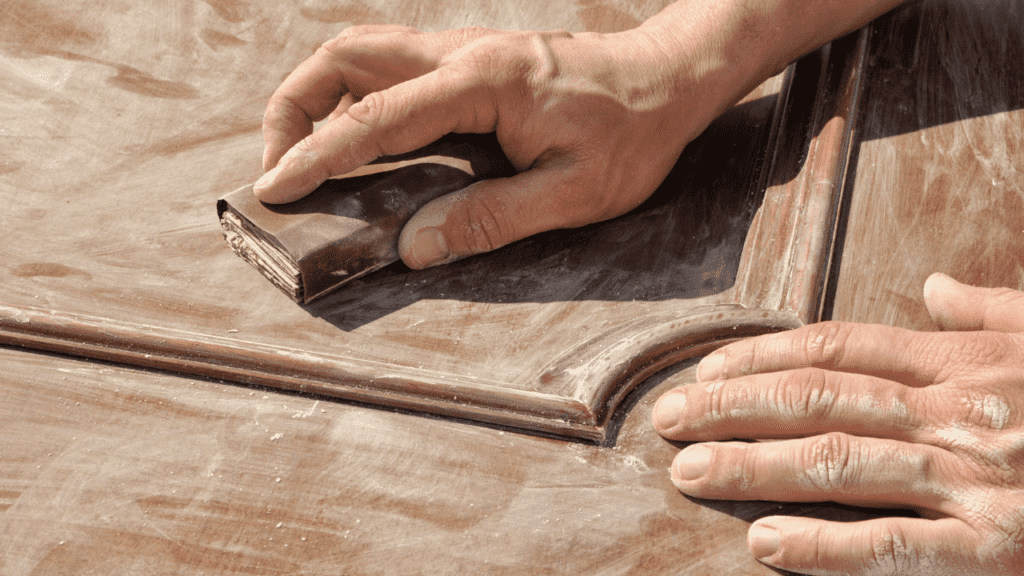
Should I Sand Before Painting?
Most certainly. While sanding is a horrible job, not to mention really boring, it is actually a vital part of the process.
Here Are A Few Tips That Will Help You When It Comes To The Sanding Stage
If you have one available, try and use an orbital sander for the flat areas. This type of sander will significantly lower your workload. DeWalt has a good range, such as the Brushless Orbital Sander, easy to use and long-lasting.
Start with a low number on your sandpaper, then gradually go up high. The number 100 is a good place to start and end in a number 220, the highest most people work with. If you really want a glass-smooth area, then you can work with number 320.
If you have grooves in your cabinets or areas that you cannot reach or is very difficult with a sander, consider using a foam sanding pad
I Already Cleaned My Cabinets. Do I Need To Do It Again After Sanding?
Yes, you will. If you have a vacuum handy, use your brush attachment and vacuum down the cabinets once you have finished sanding.
For a perfect clean, you will need to lightly rub down the cabinets with a beeswax-impregnated cloth. Don’t make the mistake of rubbing too hard.
When you have no residue appearing on the cloth, you can consider your cabinets cleaned.
Can I Use Any Type Of Paint For The Cabinets?
Unfortunately, not. When you are coating or painting your cabinets, it is important that you choose the right type of paint that is recommended for cabinets.
Acrylic and enamel or paint that is advertised for cabinets are a good choice to ensure you get the best results. INXL-X cabinet paint and the Giani Granite cabinet paint are great options with affordability.
If you are going for a wood stain look, then go for an oil-based finish which will provide you with a long-wearing and hard surface compared to a water-based.
I Have Heard About Sanding After Each Layer. Is This True?
It is recommended to build up layers of the paint and finish to allow for a rich appearance and shell-like surface that is durable. Sand after each coat has completely dried which will remove any dust or impurities and gives the cabinets a better feel and look.
Where Is The Best Place To Work On The Cabinets?
You might think working outside in the fresh air is the best. Actually, it isn’t. the airborne particulates like dust, leaves, fuzz, and pollen will stick to the wet coat and cannot be removed without damaging the finish.
If this happens, you will need to re-sand and re-coat all over again.
Working undercover with a door open such as your garage is a good place to work as long as it is clean and dust-free before you start.
If you have other parts drying, don’t go ahead and sand in the same area as the dust will settle on the paint if it hasn’t completely cured yet.
Does Slow And Steady Win The Race?
It sure does in this instance. It can be annoying and painstaking taking all the doors off and hardware, then sanding it all, painting, and waiting for it to cure.
If you feel it is getting too much for you and you are overloaded, segment your time into better manageable parts over a few weeks.
Setting smaller goals will help you finish it all without feeling like your banging your head against a wall in frustration. You could also consider getting friends and family over for a working bee to help you refinish the cabinets.
Conclusion
Refinishing your cabinets is a great way to save money but also update and give your cabinets a new look.
This isn’t just limited to your kitchen you can do it in your bathroom, laundry, and bedroom just ensure you get the right paint for the type of cabinet material such as wood or laminate.
Importantly have fun trying out these best cabinet refinishing tips.
Frequently Asked Questions About Cabinet Refinishing
Is Dampness A Concern When Painting Cabinets?
If you have wood cabinets then humidity is not your friend, especially when trying to paint in rainy weather. It is a good idea to paint when the humidity is low, and the weather is warm.
How Long Does A Cabinet Refinish Last?
You can get over 15 years out of your refinished cabinets if the job is done properly you look after them and they are maintained with the right cleaner.